Steps to Make a Simple Game in Unity

Ah, Flappy Bird – the game that had us all glued to our screens, guiding that little bird through pipes, only to see it hilariously face-plant “BoNk” one second later. Good times, right?
Now, if you’re diving into game development, Flappy Bird is basically the ‘hello world‘ of the gaming universe. It is the ultimate beginner’s project that every aspiring developer tackles at some point. So, in this post, we’re going to build our own Flappy Bird game using C# and Unity. Let’s not let our bird crash before it even takes off – time to start our game, let us get into the MISSION!
MISSION “CREATE FLAPPY BIRD“
STEP 1: To create this project, you will need 2 things installed properly.
- Unity
- Unity Hub
You can download them from here as well.
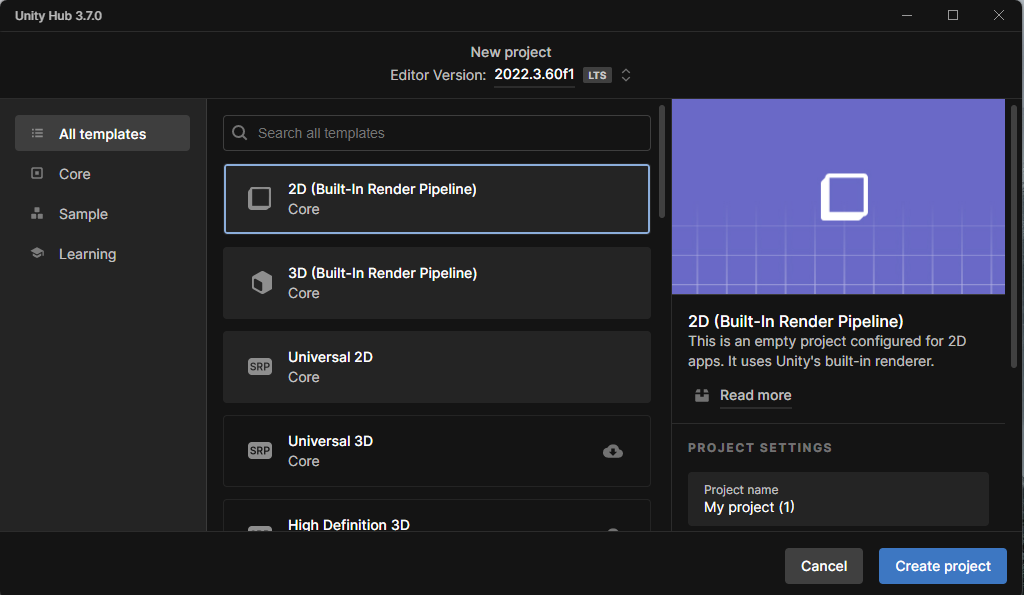
STEP 2: Now, we will open the Unity Hub that we told you to install and then create a 2D Project.
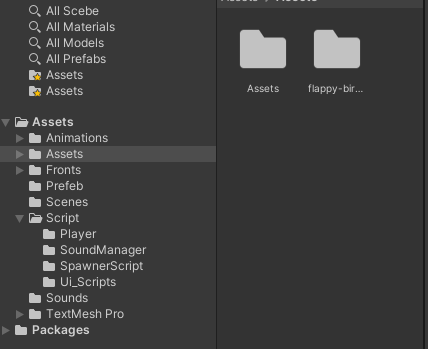
STEP 3: Then we need to create a “Sprites folder” which you can find in the game directory and we will be importing all the images that we need for the game.
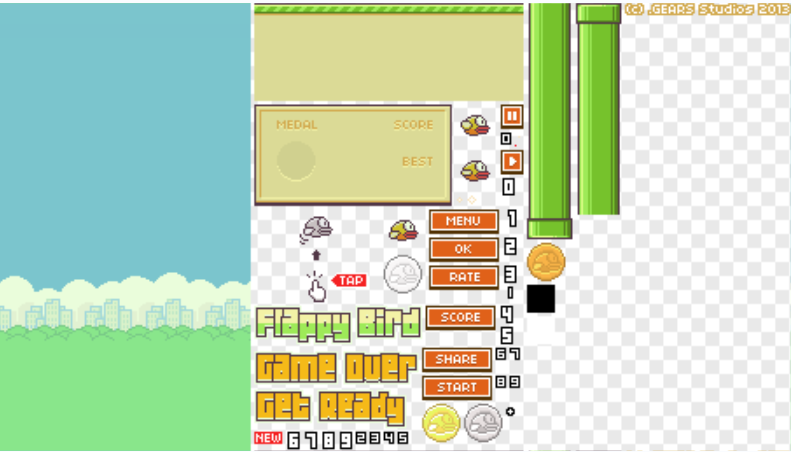
STEP 4: Now coming to downloading assets. What game assets will you need? We will need:
- The Bird
- The Pipes
- The Interfaces, etc.
Now, once you have completed the “download assets file“, go back to Unity and import the image.
Once you have imported, select the sprite and make sure you set its sprite mode to Multiple and Filter mode to Point and Compression to None. This will also make your sprite sharp and high quality.
And then click Apply to save changes.
STEP 5: Now as you have already noticed, our assets are compiled into a PNG file that is converted into a sprite, once imported in Unity.
Then, we need to slice this sprite using Sprite Editor so that we can easily use the objects such as the pipes, the bird, etc.
Now, select the sprite again, and right under the Generate Physics checkbox, click the Sprite Editor button.
This will open the following window.

STEP 6: Now to create a new sprite, select the objects just by dragging inside the Sprite Editor. Once you are done slicing the sprite, click Apply.
Once you are done, you will be able to see all the sprites sliced inside your Flappy Bird sprite asset.
Setting the Game Setup
STEP 7: As we are done with our assets, let us start adjusting our game aspect ratio to 9:16.
Now we will drop our game background into the hierarchy.
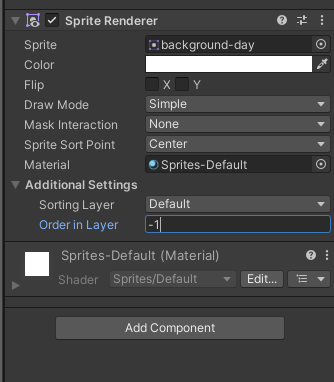
STEP 8: Now, move to the Scene window (CTRL + 1) and just click on the Main Camera inside the hierarchy and drag the white dot down until it matches the size of our background.
Then, go to the Inspector window and set ‘Order in Layer‘ value to -1.
This should make your game preview ready for the player.
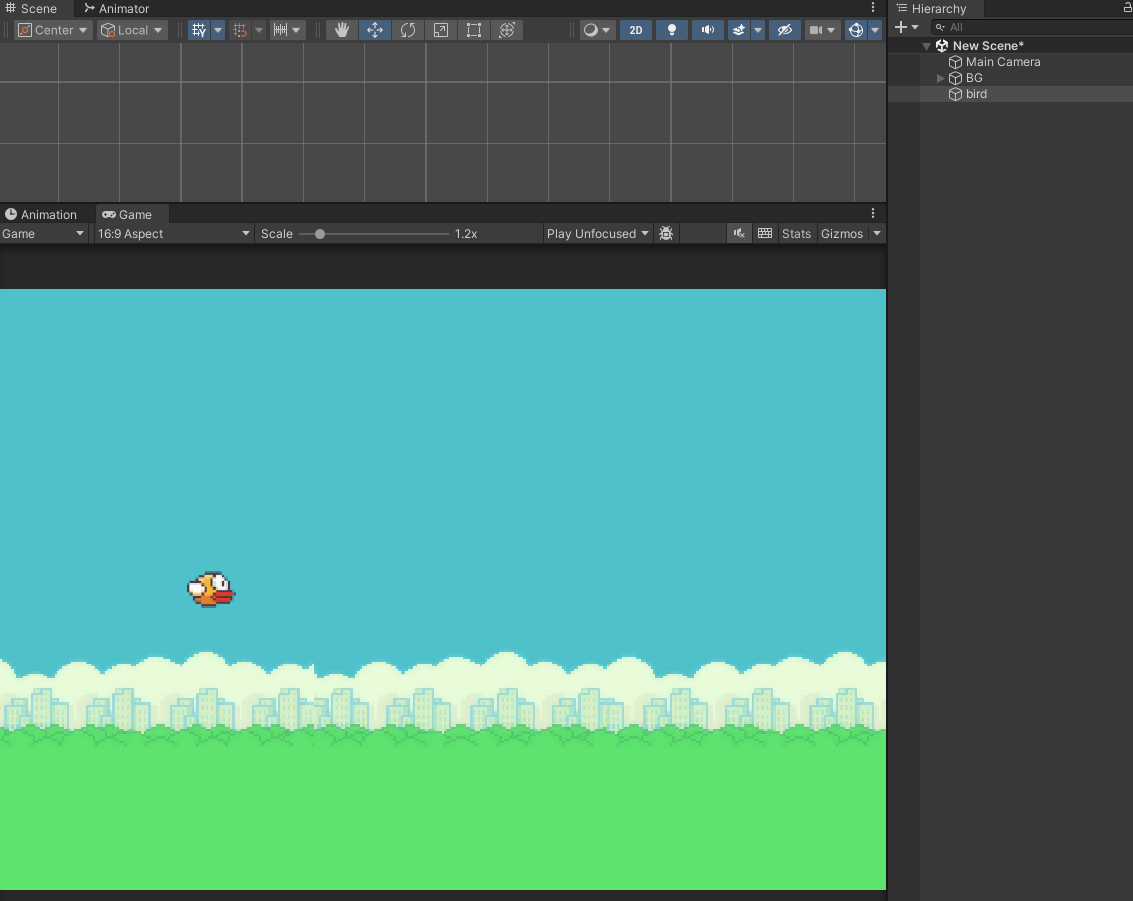
STEP 9: Now, as we are done with the background, the next thing we will be going to work on is the bird or our Player.
Let’s go back to our Project files and then we will have to open our Flappy bird sprite once again and then drag the bird sprite with its wing raised up into our hierarchy.
Rename the game object to Player.
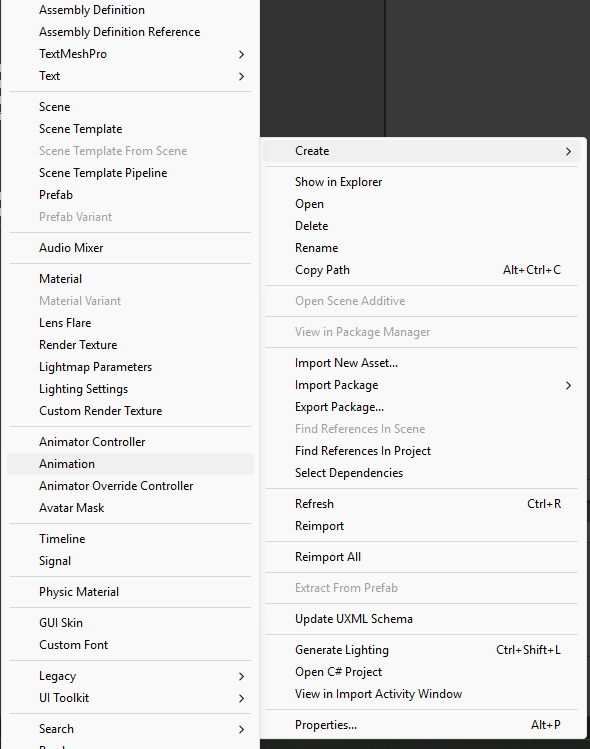
STEP 10: This time we are going to create a new animation. Go to your project window ‘click right’ select create then choose Animation. (P.s: You can name this project whatever you want)

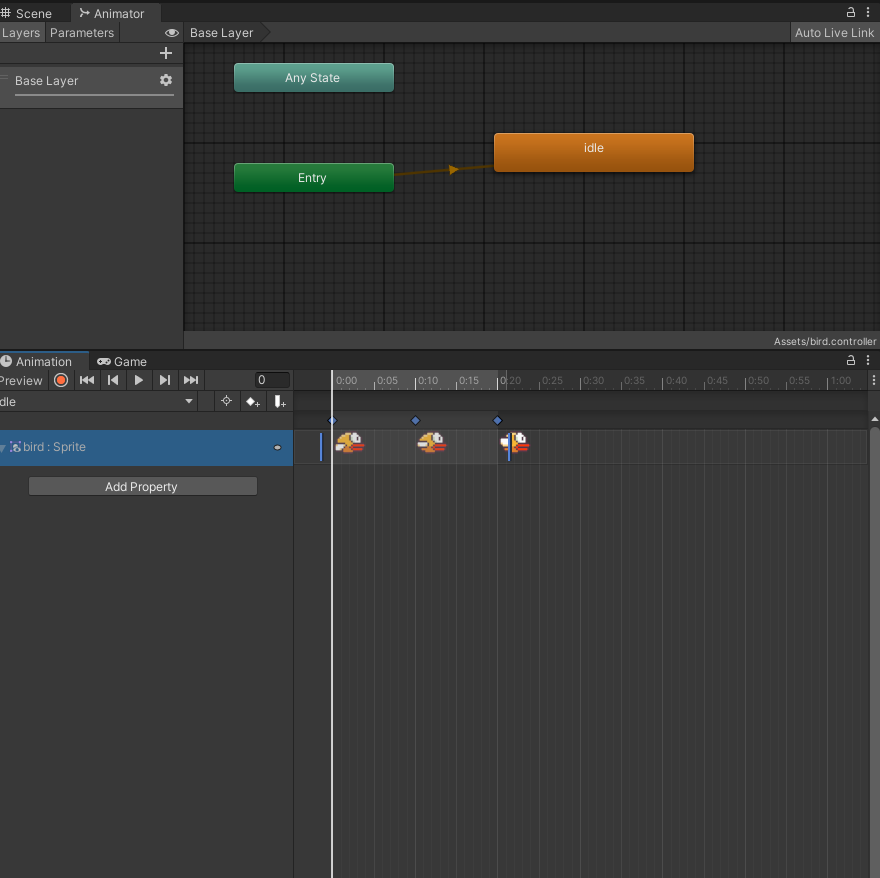
Now drag the animation to the Player game object. This will automatically generate a new Animator component for our Player.
STEP 11: Next, Press (CTRL + 6) an animation window will open. With your selected player, just go to your project window, then open the Flappy Bird sprite, and drag all the 3 bird sprites which you have in the animation window.
For making our animation look better, we will need to adjust the animation just by dragging the last keyframe to 0:10 and the second keyframe to 0:05 and leave the first keyframe to its original place.
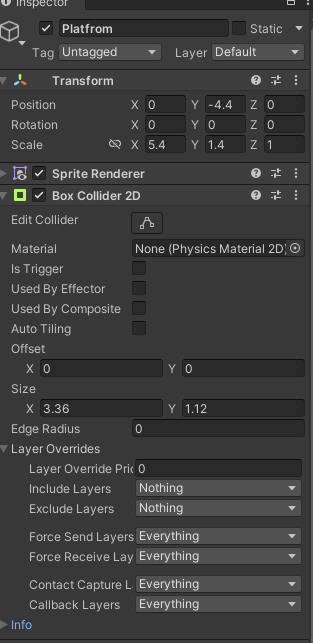
STEP 12: The next game object that we need is the platform.
Now, go to your Project window once again and drag and drop the platform in the hierarchy.
STEP 13: Now, we need to drag this platform down at the very bottom of the screen.
So go to your scene window again and just drag the platform down.
And we will also rename this game object to Platform.
Now do the same with the background, let’s just rename it to Background.
And then select your Platform game object and change its Draw Mode to Tiled. We will also change its Order in Layer to 1.
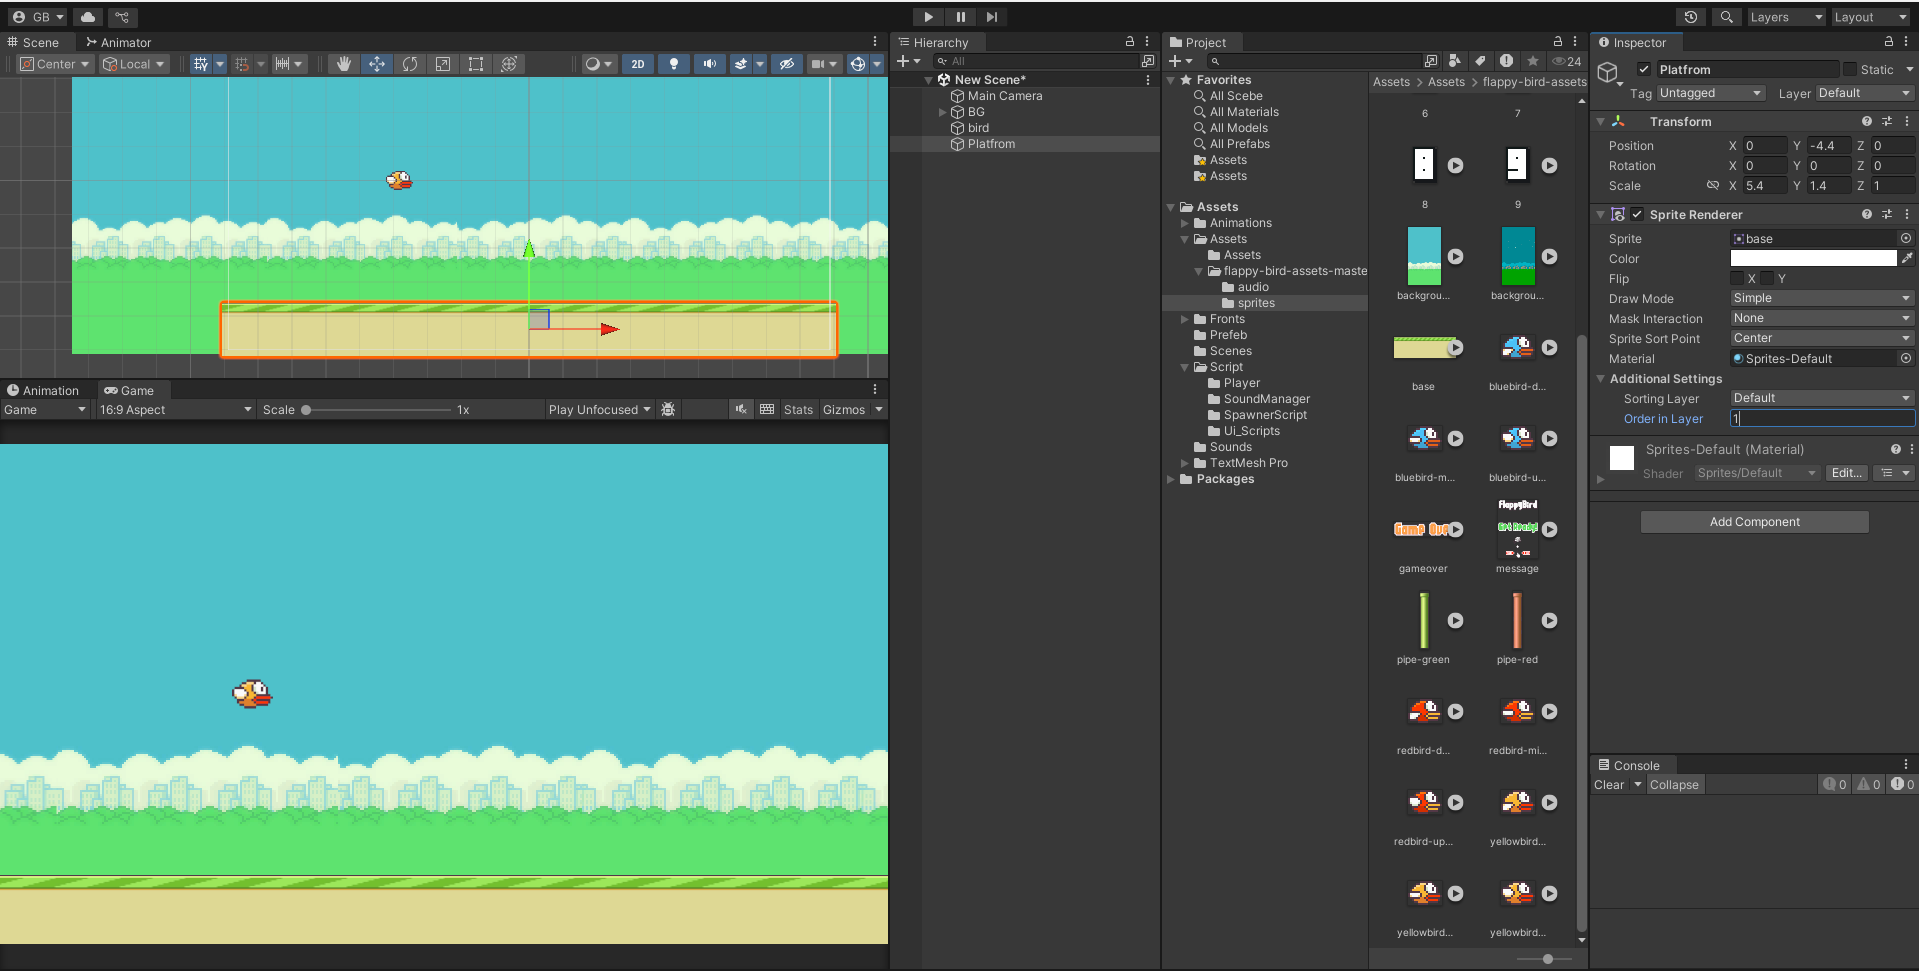
STEP 14: This will make our platform smooth and be displayed at the top of everything.
Next, we’ll add a box collider to this game object just by clicking the Add Component button and searching Box Collider 2D.
Make sure you set its Auto Tiling to true.
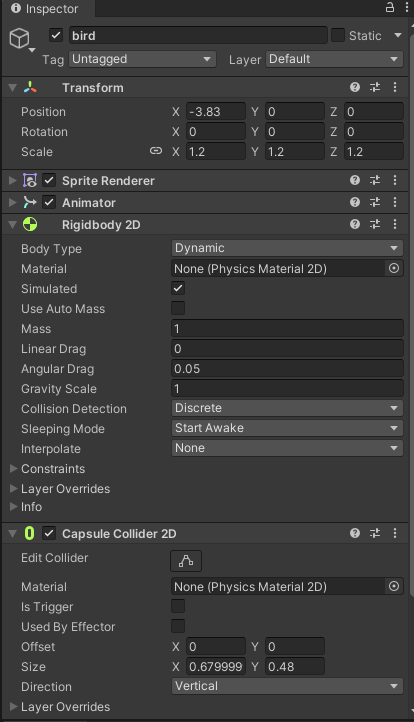
STEP 15: To make the game work correctly, we need to apply physics to the player.
- Select the player object in your game.
2. In the Inspector window, click on Add Component, and search for Rigidbody 2Dto add it.
3. Next, we need to add another component. Click Add Componentagain, and this time, search for Capsule Collider 2D.
4. After adding the Capsule Collider, change its direction to Horizontal.
5. Finally, click the Edit Collider button and adjust the size of the capsule collider to fit your player.
STEP 16: Now we are going to create a new script so that we can make our player jump as soon as we tap our screen.
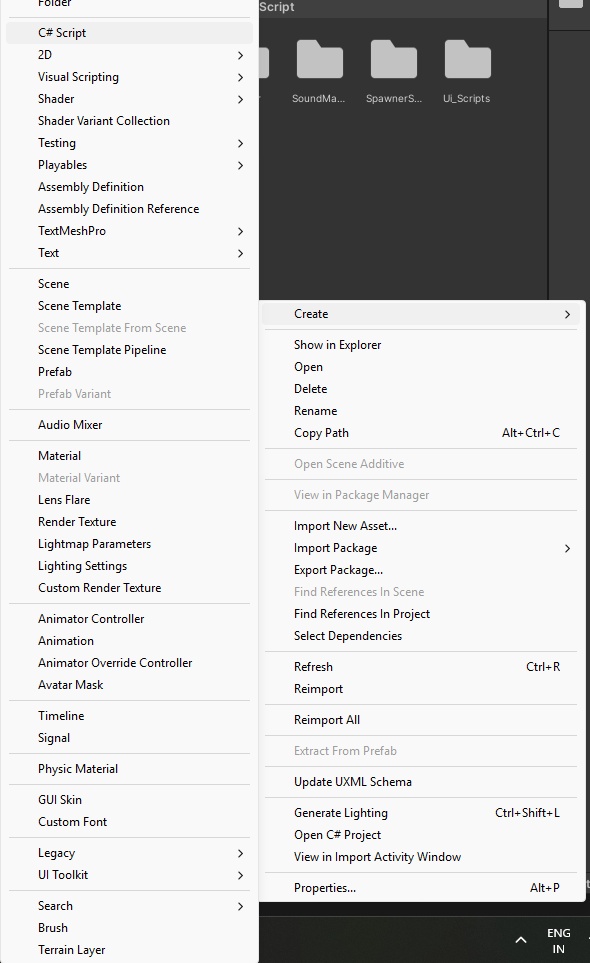
So now, you will have to go to your Project window, right-click, select Create, then choose C# Script.
Now let us name our script Player.cs
Once you have created the script, drag the script to the player game object and then open that script with Visual Studio.
——————————————————————————————————-using System.Collections;
using System.Collections.Generic;
using UnityEngine;
public class Player : MonoBehaviour
{
public float velocity = 2.4f;
private Rigidbody2D rigidbody;
// Start is called before the first frame update
void Start()
{
rigidbody = GetComponent<Rigidbody2D>();
}
// Update is called once per frame
void Update()
{
if(Input.GetMouseButtonDown(0))
{
rigidbody.velocity = Vector2.up * velocity;
}
}
}
Code language: C# (cs)
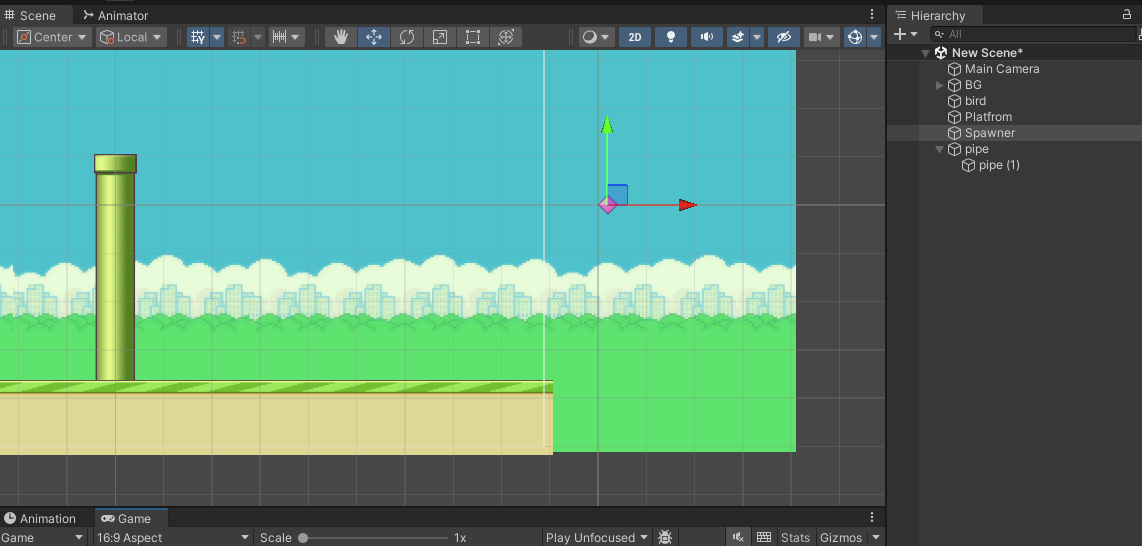
STEP 17: Now that our player, platform, and background are ready, it’s time to create the obstacles (also known as warp pipes).
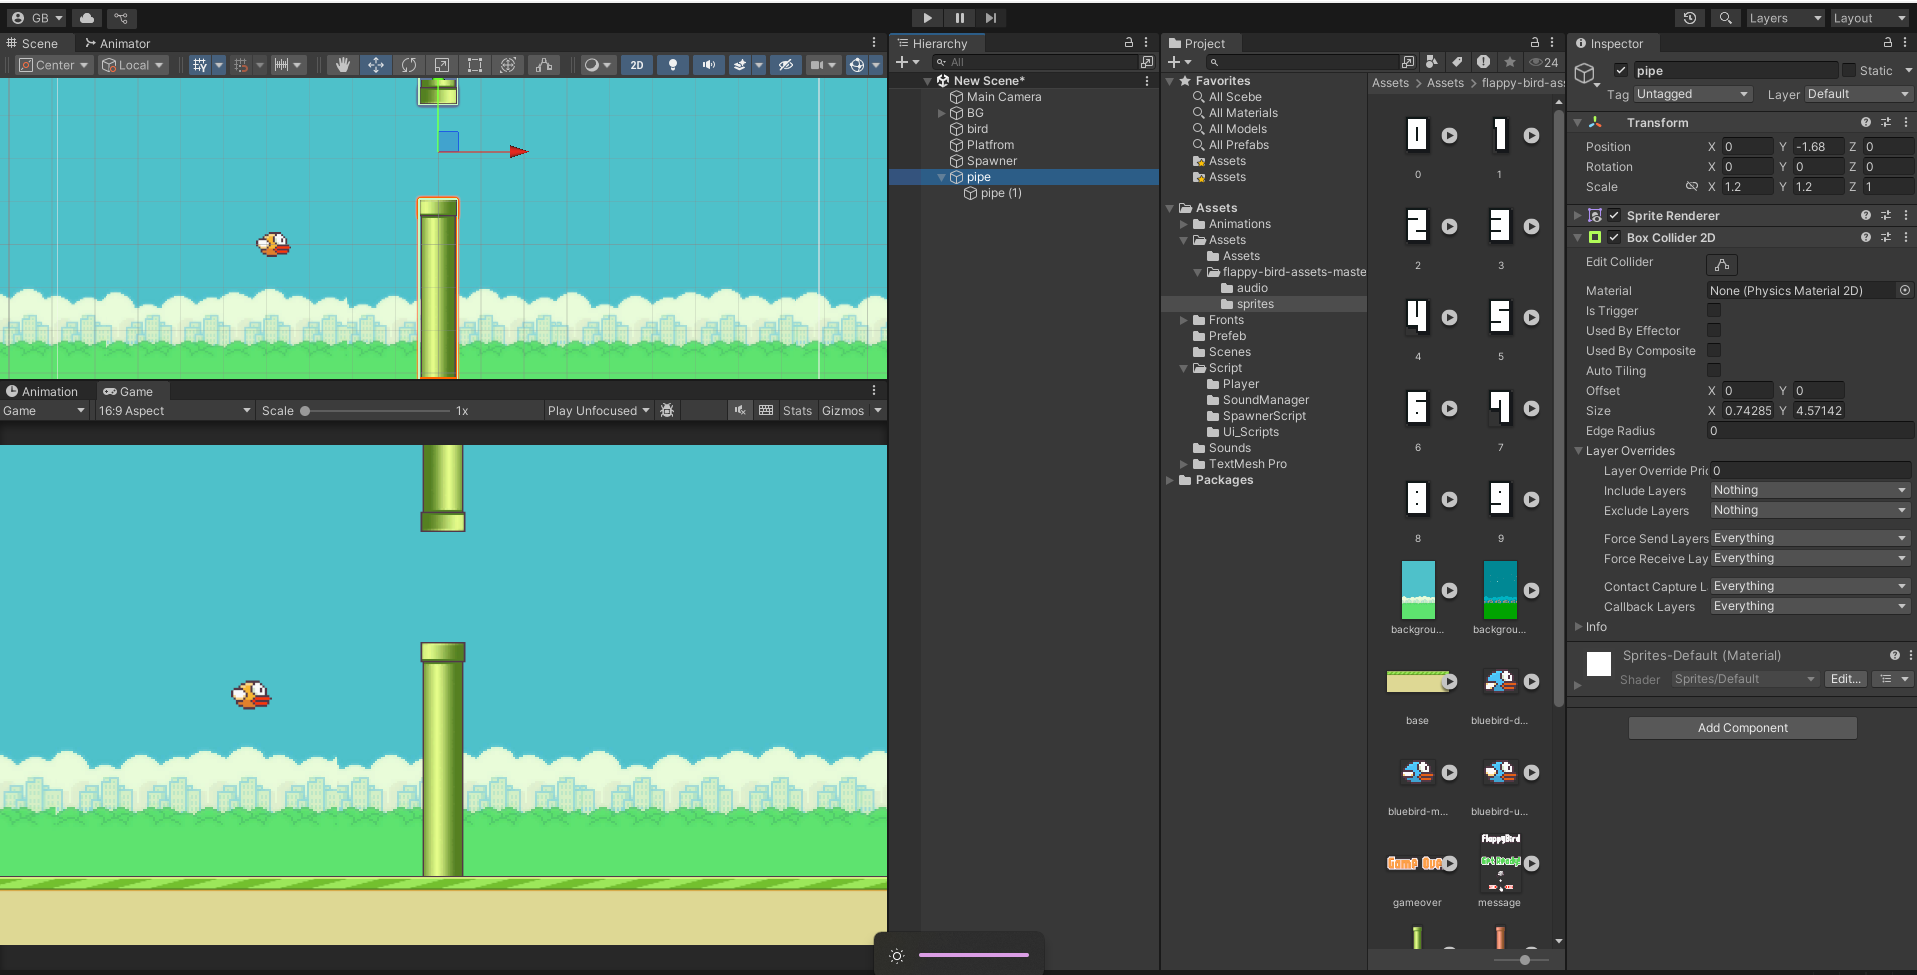
- Open your sprites and drag the two warp pipes into the scene.
- Select the warp pipes, then click Add Componentand search for Box Collider 2D to add it to them.
- Align the two pipes vertically, similar to how they appear in the game.
- Create an Empty Game Objectand name it Obstacle Pipes.
- Drag the two warp pipes into this empty object. This means the empty game object will become the “parent” of the two warp pipes.
- Make sure the empty game object is placed between the two warp pipes.
Next, we’ll create a new C# script but this time it’s obstacle.cs
using System.Collections;
using System.Collections.Generic;
using UnityEngine;
public class obstacle : MonoBehaviour
{
public float speed;
// Update is called once per frame
void Update()
{
transform.position += ((Vector3.left * speed) * Time.deltaTime);
}
}
Code language: C# (cs)
Make sure to drag this script to the Obstacle Pipes game object.
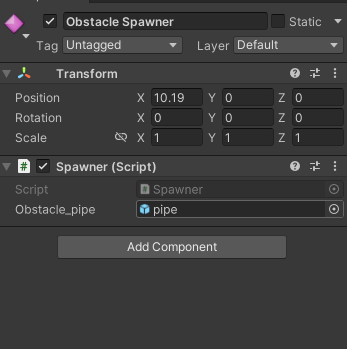
STEP 18: Now that our obstacle is ready, we can create an obstacle spawner so the obstacles keep appearing continuously.
- First, create another Empty Game Objectand name it Obstacle Spawner.
- Reset its Transformposition, and then move its X position to the far right of the screen.
- Next, create a new C# script and name it cs.
- Finally, assign this script to the Obstacle Spawnergame object.
———————————————————————
using System.Collections;
using System.Collections.Generic;
using UnityEngine;
public class spawner : MonoBehaviour
{
public float queueTime = 1.5;
private float time = 0;
public GameObject obstacle;
public float height;
// Update is called once per frame
void Update()
{
if(time > queueTime)
{
GameObject go = Instantiate(obstacle);
go.transform.position = transform.position + new Vector3(0, Random.Range(-height, height), 0);
time = 0;
Destroy(go, 10);
}
time += Time.deltaTime;
}
}
Code language: C# (cs)
———————————————————————
Make sure to save all of your scripts and your scene.
STEP 19: Now, go back to Unity, and let’s save the Obstacle Pipes as a Prefab. To do this, drag the Obstacle Pipes into the Assets folder.
Next, select the Obstacle Spawner game object, and drag the Obstacle Pipes prefab into the Obstacle variable.
Finally, you will get the following results…
We’re almost done! But if you notice, the platform isn’t scrolling horizontally with the warp pipes, which looks strange.
To fix this:
- Create a new animation and name it platform.
- Drag this animation onto the platformgame object.
- Increase the horizontal scale of your platform.
- Open the Animationwindow by pressing CTRL + 6.
- With the platform game object selected, click the Add Propertybutton in the Animation window, and select Transform, then choose Position.
- To create a keyframe, click the button next to the number input.
- At around 3:00 seconds, create another keyframe, but this time, adjust the X
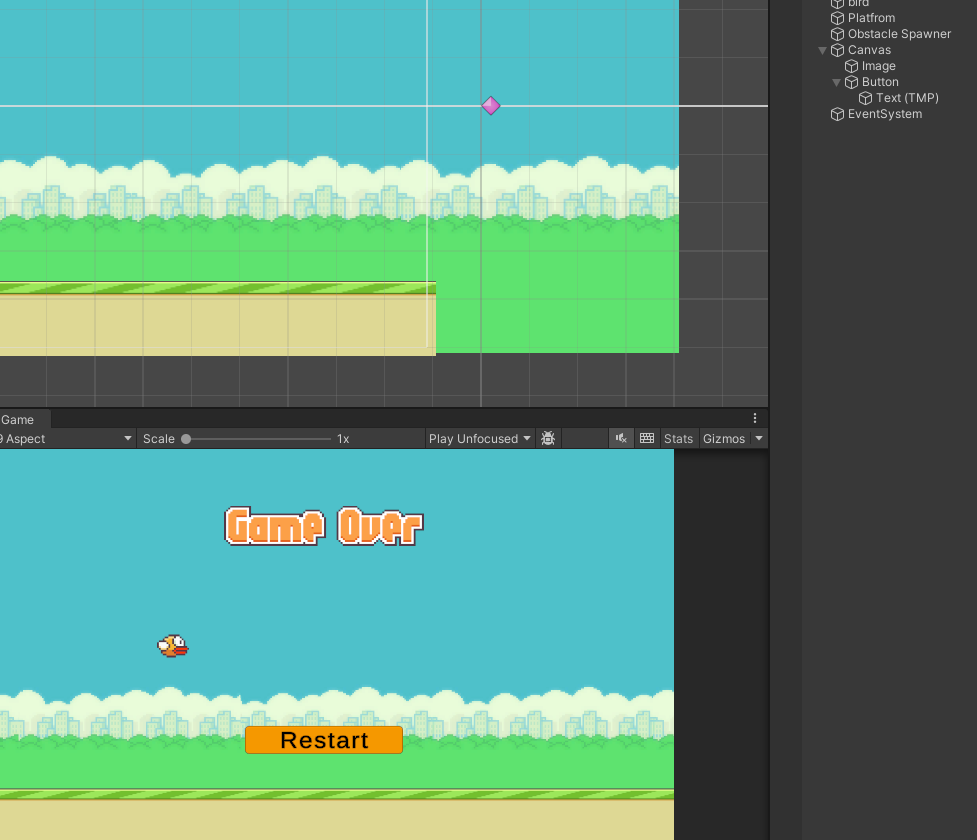
STEP 20: The game is almost done, but we still need to set up the player’s death and the user interface that appears when the player dies.
Here’s how to do it:
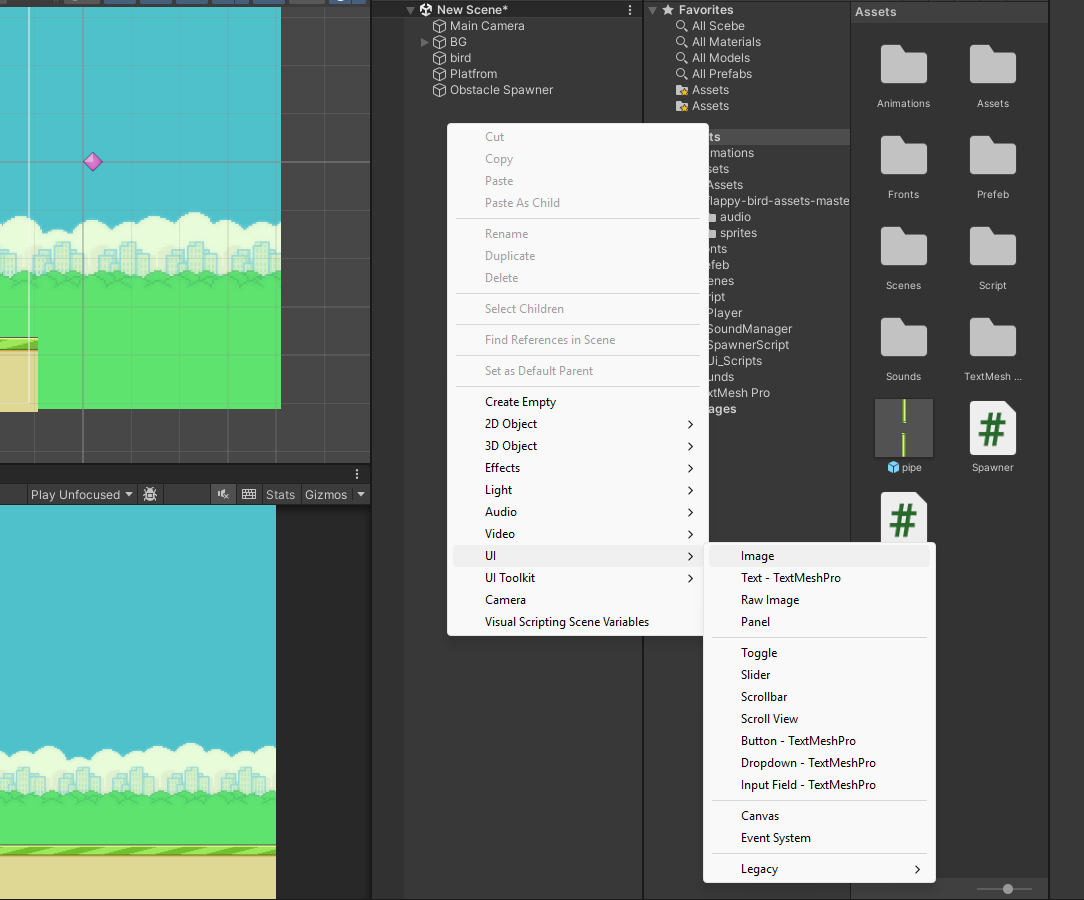
- First, create a new Canvas: Go to the Hierarchy, right-click, select UI, and then click Canvas.
- Now, right-click on the Canvasgame object you just created
- Select UIand then Image.
- Rename this Image game object to Restart Button.
- Open your Flappy Bird Spriteasset, find the play button image, and drag it into the Source Image field of the Restart Button game object.
- After applying the image, click the Set Native Sizebutton to fit the image.
- If needed, you can scale up the image to your desired size. In this case, scale it by 85on the X, Y, and Z axes.
STEP 21: Next, we need to create a game manager that will handle freezing the game and unfreezing it when the player clicks the start button. It will also freeze the game and initiate a countdown when the player dies.
Here’s how to do it:
- Create a new Empty Game Objectand name it GameManager.
- Create a new C# script and name it cs.
- Once the script is created, assign it to the GameManagergame object.
This script will control the game’s pause and restart functionality based on player actions like starting the game or dying.
——————————————————————————————————-
using System.Collections;
using System.Collections.Generic;
using UnityEngine;
using UnityEngine.UI;
using UnityEditor.SceneManagement;
public class GameManager : MonoBehaviour
{
public GameObject startButton;
public Player player;
public Text gameOverCountdown;
public float countTimer = 5;
// Start is called before the first frame update
void Start()
{
gameOverCountdown.gameObject.SetActive(false);
Time.timeScale = 0;
}
private void Update()
{
if( player.isDead )
{
gameOverCountdown.gameObject.SetActive(true);
countTimer -= Time.unscaledDeltaTime;
}
gameOverCountdown.text = “Restarting in ” + (countTimer).ToString(“0”);
if(countTimer < 0)
{
RestartGame();
}
}
public void StartGame()
{
startButton.SetActive(false);
Time.timeScale = 1;
}
public void GameOver()
{
Time.timeScale = 0;
}
public void RestartGame()
{
EditorSceneManager.LoadScene(0);
}
}
Code language: C# (cs)
———————————————————————
To ensure everything works smoothly, make sure your scene is added to the Build Settings; otherwise, you’ll get an error when starting the game.
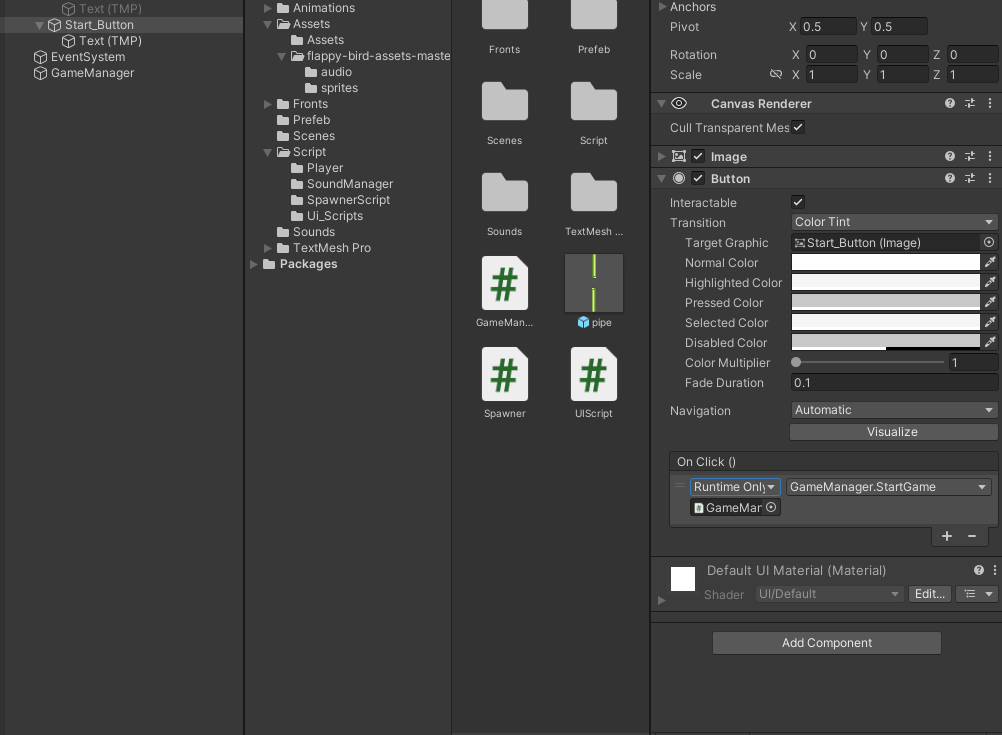
Now, let’s set up the Play button:
- Select the Play Buttonimage in the scene.
- Click Add Component, then search for Buttonand add it.
- In the Buttoncomponent, find the On Click()
- Click the small plusbutton in the bottom-right corner to add a new list item.
- Drag the GameManagergame object into the box under the Runtime Only
- In the No Functiondropdown, select GameManager, then choose StartGame().
- Select the GameManagergame object and drag the Play Button image into the Start Button field in the script.
Finally, don’t forget to save your scene!
STEP 22: To make the player die when it hits the floor or warp pipes, you need to add collision detection to the Player.cs script. Here’s how to do it:
- Open the csscript.
- Add the following code to detect collisions:
——————————————————————————————————-
public GameManager gameManager;
public bool isDead = false;
private void OnCollisionEnter2D(Collision2D collision)
{
isDead = true;
gameManager.GameOver();
}Code language: C# (cs)
——————————————————————————————————-
- Make sure that the floor and warp pipes have the correct tags: “Ground”for the floor and “Obstacle” for the warp pipes.
This code will trigger the Die() function whenever the player collides with the ground or warp pipes, and you can link this function to the game manager to handle game over logic.
To finish setting up the game, start by creating a Text UI object. Right-click in the Hierarchy, select UI, and then choose Text. This will be used to display game-related information like the score or game over message. Once created, adjust the text’s properties by setting the alignment to center, checking the Best Fit option, and changing the Font Size to 25 with the Font Style set to Bold. Then, move the text object upward by adjusting its Y-axis position to 125.65.
Next, for better visual design, add a Shadow component to the text. To do this, with the text object selected, click Add Component, search for Shadow, and apply it. This will give the text a nice shadow effect, enhancing its appearance on the screen.
Finally, connect the GameManager script to the necessary objects. Select the GameManager game object in the Hierarchy and drag both the Player game object and the Text UI object into their respective fields in the GameManager script. This step ensures the script can control both the player and display text during gameplay.
Once all these steps are completed, save all your scripts and your scene. You’re now ready to play your Flappy Bird game!
Wait, hold on a second!
Do you know?
Game development is in huge demand among employers and the job market as well. Many companies are looking for developers who are skilled in game development and can use it to create engaging and complex games. According to industry reports, game development is one of the most sought-after skills, and its popularity is expected to grow in the future. So, strike while the iron is hot and step into the industry as a fully trained professional with our game development course!